DevDiary - 2D - Day #2
Setting up the hex grid

Oh man, my brain hurts.
I know, Unity3D can be a pretty good engine - but it’s just so unintuitive in some parts. If you don’t know what you’re doing
you will certainly be lost.
But I’m lucky. I already put a few hours into Unity before, so I at least know the layout and some functionality.
The main problem on sunday - I’m writing this on monday - luckily were other things.
So let’s start at the beginning and pretend I wrote this on Sunday while at the same time developing in Unity!
Sunday, July 12, 2020 - Big motivation!
While my Twitter poll is nearly finished the result will be quite obviously be “Unity”. I start with figuring out which OS I should use. Usually I do all the development stuff on my Kubuntu partition, but Unity seems like a “Do it on Windows”-Thing because of C# and Visual Studio Community.
But screw this. I’ll put it on my Kubuntu.
I already did my hex tiles on Kubuntu so why not the rest, too?
After downloading the app image for the UnityHub I install the latest LTS of Unity and create a project calling it “Axanthya”.
That was the name of the first attempt I made in 3D a longer time ago - so why not reuse that name?
Starting out with a 2D project setup I just get to know the UI again. I’m pretty glad I bought an ultra wide screen, so I have a lot of space to put IDE, previews, assets and all the other stuff on one screen without minimizing/maximizing my other applications the whole time.
A few months ago I read Unity3D has a pretty good TileMap support, also for hexagonal tiles, which will suit my project quite well.
Oh boy, I can’t wait to start
Using Hexes and experiencing the “Big Oof”
So, I now have this awesome - empty - project in front of me, and my absolutely brilliant hex tiles I made one blog post ago. I’m absolutely ready to go!
Creating a TileMap with HexTiles flat top - because that’s the rotation I chose for my tiles.
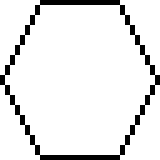
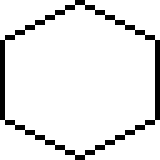
Before inserting my Sprites into the grid I have to create Tiles out of them. No Problem.
Just use the Sprite for the tile, set the size to my chosen 32x32px and add them to my Tile Palette.
The palette step is not necessary for my procedural generated approach, but I just think it’s neat.
To test the grid on it’s own I just pick this sweet hex, put it onto the grid and…
Oh seriously, what the fuck heck, man?
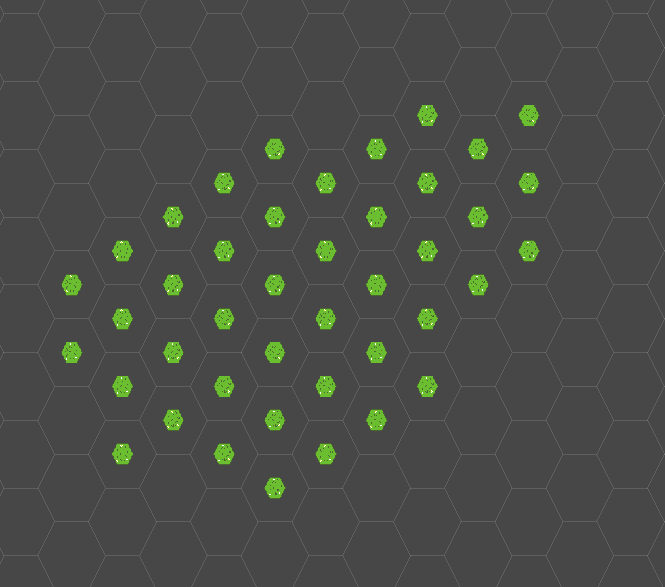
Okay, somehow my tiles don’t fit in the grid. No big deal, just google a bit what to do.
Beforehand I’d see two possibilities: Either make the grid cells smaller or stretch my tiles to fit the grid.
I don’t want to make the cells smaller, or I’ll have to zoom in way too far. Okay, that wouldn’t be a problem either. Also, I don’t really think it will make all the difference in the end.
So, stretching it is.
Just adapting the X and Y value to my tile size aaaaand…
GOD DAMN!
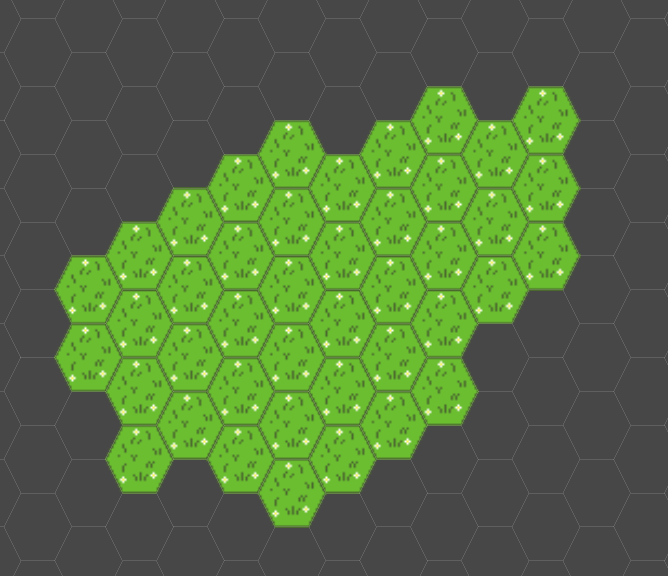
Breathes Okay, no. I know this from applications like Photoshop: You can stretch images with different filters.
Looking at the Sprites I noticed “Bilinear” which is just a big wishy-washy-no-no for pixel graphics.
Changing this to “Point (no filter)" should do the trick - and it certainly does.
Soooooo - NOW it will absolutely work.
Putting in my hex tiles and yes - they have the perfect size
BUT WHY WOULD YOU DO THIS TO ME!?
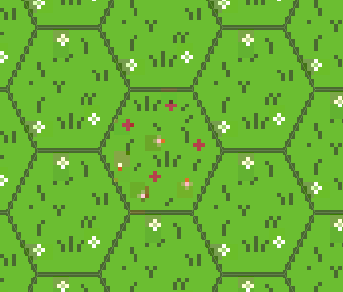
Looks like a stupid image compression. Once again I’m in the sprite and yes - there is a compression for low quality.
Yeah. Nice preconfiguration. Because everyone wants low quality pictures.
After getting rid of it FINALLY my tiles look great.
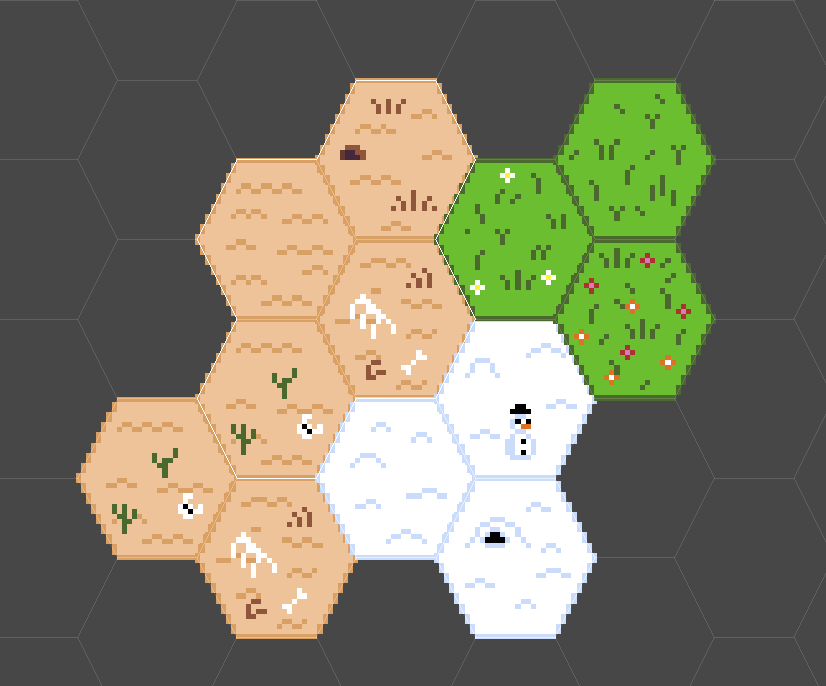
I’m glad after some starting hassles now everything works as intended.
But does it really?
Now the graphics are set and I can start procedural terrain generation.
I want to start simple:
- Create a script WorldGen
- Input parameters are height and width, some arrays of Tile for the biomes and the Tilemap itself
- For a simple start just two for loops to fill the chosen height and width with simple grass tiles
WorldGeneration.cs
void Generate() {
    for (int x = 0; x <= height; x++) {
        for (int y = 0; y <= width; y++) {
            Tile tileToSet = grass[0];
            map.SetTile(new Vector3Int(x, y, 0), tileToSet);
        }
    }
}
But you see? Height and width are switched when using the flat top hexes. God knows why.
And the result is exactly what I expected.
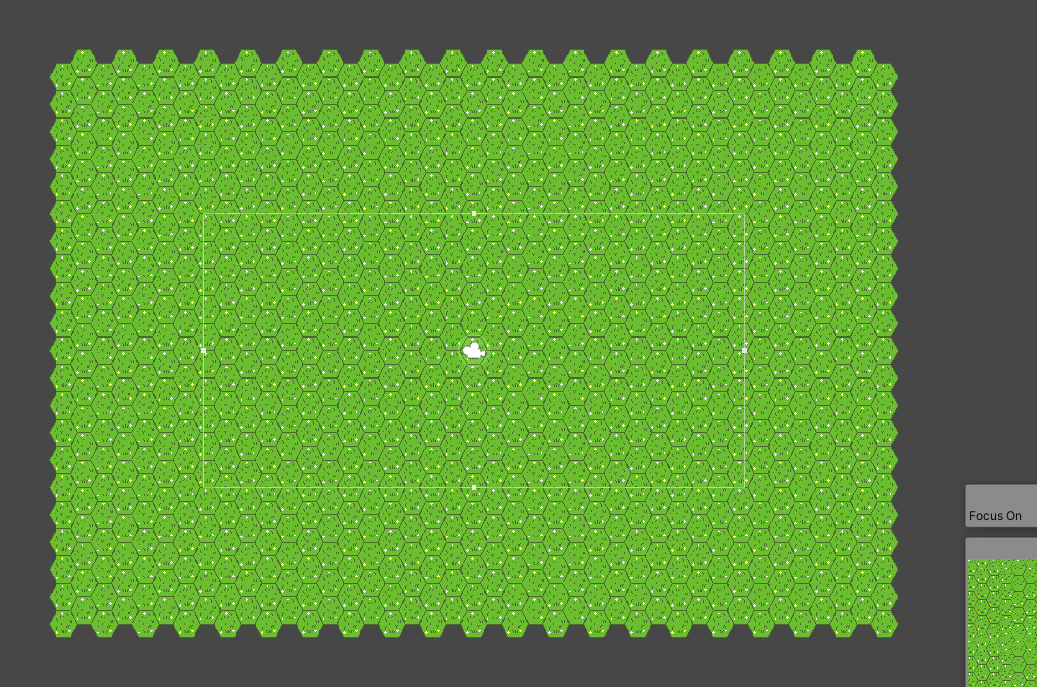
To clarify where the axis actually are I’m going to set every 0 X or Y to another tile, to make it clear. Also, to have the 0 exactly in the middle I’m going to start generation not at x|y = 0, but x|y = -(width|height) / 2 and end at width|height / 2 respectively.
WorldGeneration.cs
void Generate() {
    for (int x = -(height/2); x <= height/2; x++) {
        for (int y = -(width/2); y <= width/2; y++) {
            Tile tileToSet = grass[0];
            if (x == 0) {
                tileToSet = snow[0];
            }
            if (y == 0) {
                tileToSet = desert[0];
            }
            map.SetTile(new Vector3Int(x, y, 0), tileToSet);
        }
    }
}
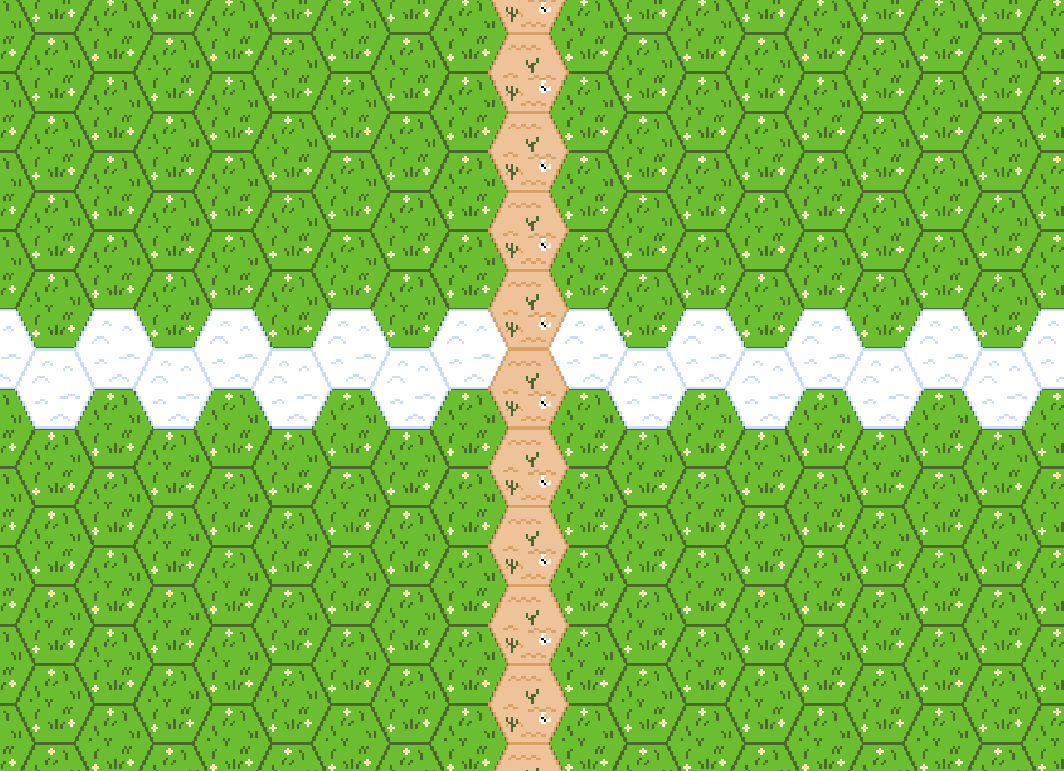
Sadly, this is exactly what I expected. (Why do you hate me, Unity?) The hex grid tilemap uses the Unity offset coordinates - but at least only in whole numbers.
They might not be the actual offset coordinates, but actually based on the grid, as you can see with the zig-zag x axis.
To iron that out I have to create a Class HexMap.cs to hold all the tiles with their respective coordinates.
So the tiles can hold the coordinates I have to create HexTile.cs as a programmatic representation of the tiles.
And so the Hex Tile can hold the coordinates… They have at first actually exist in HexCoordinates.cs.
HexMap.cs
public class HexMap {
	private static Dictionary<HexCoordinates, HexTile> HexTiles = new Dictionary<HexCoordinates, HexTile>();

	public static HexTile GetHex(HexCoordinates hexCoords) {
		return HexMap.HexTiles.ContainsKey(hexCoords) ? HexMap.HexTiles[hexCoords] : HexTile.NULL;
	}
	public static void SetHex(HexTile hexTile) {
		HexMap.HexTiles[hexTile.HexCoords] = hexTile;
	}
}
HexTile.cs
public class HexTile {
	public HexCoordinates HexCoords {get; set;}
	public Vector3Int UnityCoords {get; set;}
	public Tile MapTile {get; set;}
	public static HexTile NULL = new HexTile(new HexCoordinates(999999999, 999999999), new Vector3Int(0, 0, -10), null);

	public HexTile(HexCoordinates hexCoords, Vector3Int unityCoords, Tile mapTile) {
		HexCoords = hexCoords;
		UnityCoords = unityCoords;
		MapTile = mapTile;
	}

}
HexCoordinates.cs
public struct HexCoordinates {
	public int X { get; private set; }
    public int Y { get; private set; }

	public HexCoordinates (int x, int y) {
		X = x;
		Y = y;
	}

    public static HexCoordinates FromOffsetCoordinates (int x, int y) {
		return new HexCoordinates(x, y);
	}
}
For the moment the HexCoordinates are just the same as the offset coordinates to check if they actually work.
In the HexTile.cs I created a standardized NULL hex tile which may become handy later. Also, - just to have the option in the
future if I’ll ever need it - there will be an offset coordinates representation on the HexTile.
So with all that in mind just refactor the MapGeneration a bit to use my newly created classes.
WorldGeneration.cs
void Generate() {
        for (int x = -(height/2); x <= height/2; x++) {
            for (int y = -(width/2); y <= width/2; y++) {
                HexCoordinates hexCoords = HexCoordinates.FromOffsetCoordinates(x, y);
                Vector3Int unityCoords = new Vector3Int(x, y, 0);
                Tile tileToSet = grass[0];

                if (hexCoords.X == 0) {
                    tileToSet = snow[0];
                }

                if (hexCoords.Y == 0) {
                    tileToSet = desert[0];
                }

                HexTile hex = new HexTile(hexCoords, unityCoords, tileToSet);
                HexMap.SetHex(hex);
                map.SetTile(new Vector3Int(x, y, 0), tileToSet);
            }
        }
    }
I could show you a screenshot of the result - but it looks exactly the same as before, which is pretty obvious when I tell the hex coordinates to behave exactly like the offset coordinates.
What I’m going to do is simple:
- The HexCoords.X depends on the actual X|Y offset representation
- If you look at the current zig-zag shape you have to straighten it along the flat sides of the hex tile
- So depending on the Tilemap grid offset coordinates I have to shift the X value Y/2 up
- That sounds complicated at first so here are some examples:
- HexCoords.X will always be calculated with Offset.X - Y/2
- X = 0 | Y = 0 => X = 0 - 0/2 => X = 0 | Y = 0 (seriously, what did you expect?)
- X = 0 | Y = 1 => X = 0 - 1/2 => X = 0 | Y = 1 (I am using int, so every fractional number is cut off)
- X = 1 | Y = 2 => X = 1 - 2/2 => X = 0 | Y = 2
- X = 1 | Y = 3 => X = 1 - 3/2 => X = 0 | Y = 3
- X = 2 | Y = 4 => X = 2 - 4/2 => X = 0 | Y = 4
So guys: If you paid enough attention you will see, the left hand side shows the values in the offset grid, the right hand side
show which HexCoordinates should be saved.
X on the right is always 0 - exactly as it should be. Why?
Look here, I painted these tiles with an extra variant to show it to you:
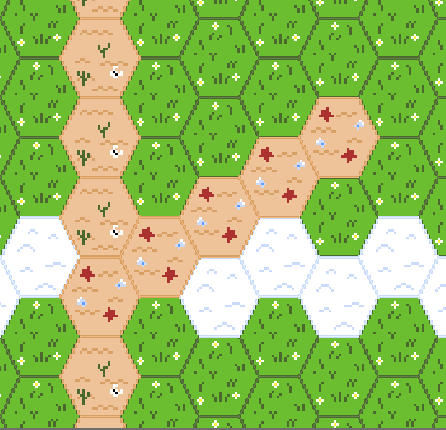
After changing the FromOffsetCoordinates Function on HexCoordinates.cs to the following everything should work as expected.
HexCoordinates.cs
public static HexCoordinates FromOffsetCoordinates (int x, int y) {
    return new HexCoordinates(x - y/2, y);
}
Aaand…
AW YEAH!!!….. Wait what?
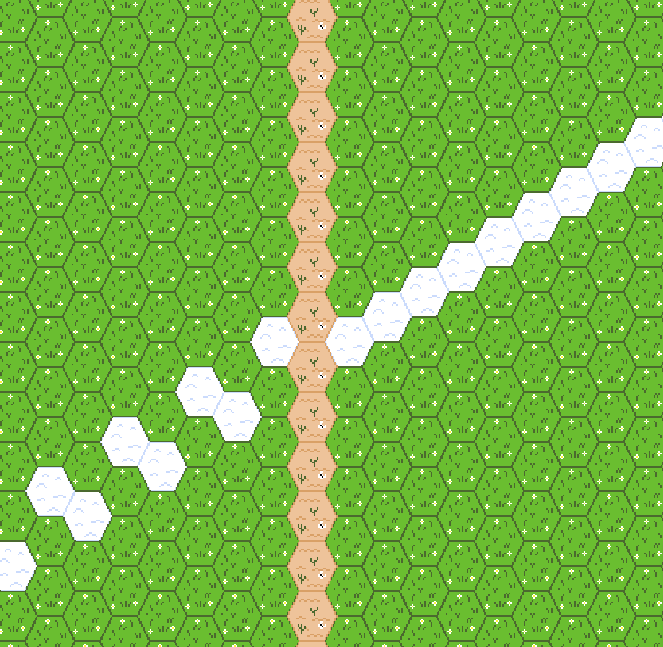
Seriously. Why? WHY!? WHY WOULD THIS GOD DAMN ENGINE DO THIS TO ME!?
That didn’t happen with the same calculation in a 3D Space!
SO WHY!?
Screw this! I’m going to fucking it something and come back later.
Fucking crap shit, fucking hell fuck seriously god damn etc
(Disclaimer: I’ve been working for about 6 hours straight at this point without eating anything. Don’t do this. Take your breaks.)
After lunch - finally: Salvation
While we pretended I wrote this text before while I was programming we’ll now get back to normal.
It’s tuesday evening, and I’m looking at all of this very retrospective. I can assure you my head actually got a lot more mad over the course of the day…
until I finally found the solution.
The whole lunch and an hour later I thought about that problem. I just could not come up with a solution.
I didn’t know if it was a fault of Unity’s Tilemap feature or my calculation.
So I asked my wife if she knew how to solve it.
She has no clue about this at all.
While I was explaining it to my wife… It clicked.
I knew the solution. It was so freaking simple.
That, my people, is Rubber duck debugging in its best form. My wife didn’t say a single word.
It simply could not be a fault on Unity’s side - because the positive side of the grid was correct.
When I switched it from left to right (I inverted the values in the calculation) it was wrong on the positive side!
So what was the solution?
Let me explain with bringing up something from before:
“I am using int, so every fractional number is cut off”.
That was brought up in a small sub-clause, while I explained my calculation.
And that my friends was the fucking problem here.
In the negatives they got cut of but because of that produced the wrong number on the negative axis.
You can clearly see it:
Every second tile is wrong, beginning with the very first (-1)
So, what was the solution?
Subtract 1 when Y < 0.
Yes it is that simple. Yes it works.
HexCoordinates.cs
public static HexCoordinates FromOffsetCoordinates (int x, int y) {
    int yNew = y < 0 ? y - 1 : y;
    return new HexCoordinates(x - yNew/2, y);
}
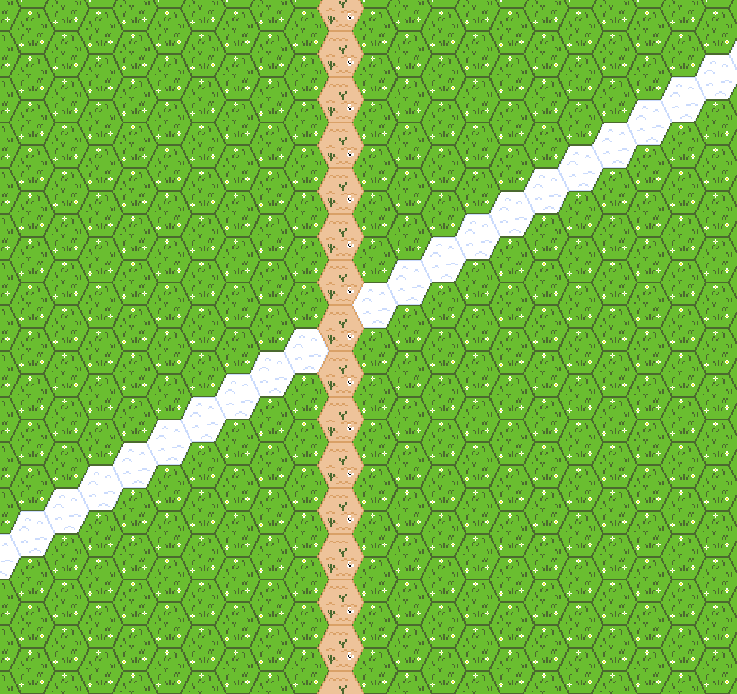
And, now I got that working, adding a third Z axis should absolutely be no problem, because it’s just the opposite of X.
You don’t even have to explicitly set its value because you can calculate it from X and Y.
HexCoordinates.cs
public struct HexCoordinates {
	public int X { get; private set; }
    public int Y { get; private set; }
    public int Z => -X - Y;

	public HexCoordinates (int x, int y) {
		X = x;
		Y = y;
	}

    public static HexCoordinates FromOffsetCoordinates (int x, int y) {
		int yNew = y < 0 ? y - 1 : y;
		return new HexCoordinates(x - yNew/2, y);
	}
}
I added a new if (hexCoords.Z == 0) to WorldGeneration.cs and set it to beach[0] and it’s beautiful.
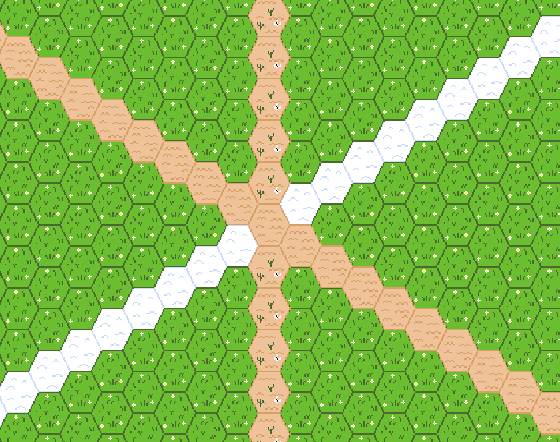
The moral of the story…
Seriously guys - take your breaks. Eat something, drink a glass of water.
You’ll find your solutions when you are well rested.
You know I did one more thing on that day but damn, I want to get this post out finally.
Next diary entry will have:
- Select a tile and it’s neighbouring tiles within a given range
- Renaming X|Y|Z of
HexCoordinatesto Q|R|S to differentiate them much better from the offset axes- I guess you saw in my calculation examples a bit above it can be quite confusing
- Changing the Dictionary in the HexMap to 3D array
- Changing UnityCoords to TilemapCoords to be more specific
That’s it
Thanks for reading!